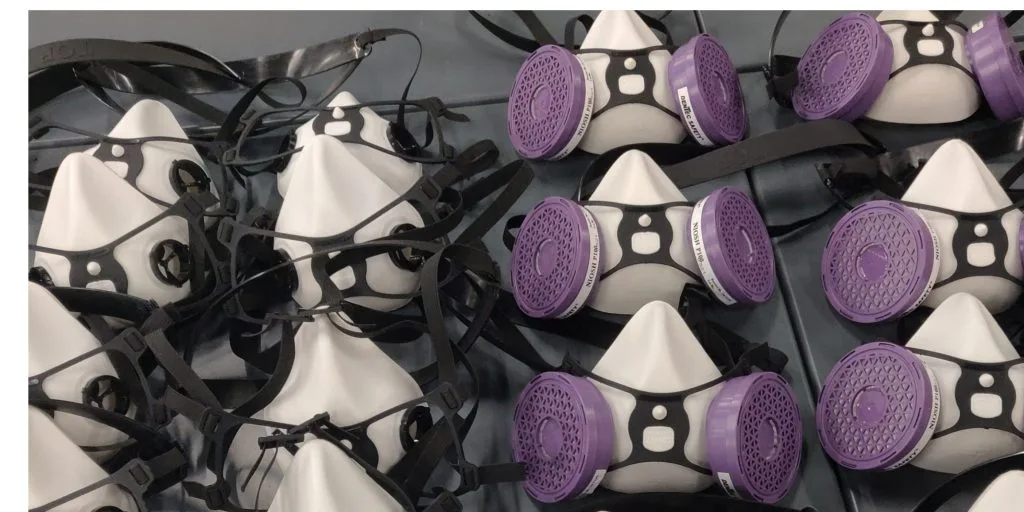
Taking care of a respirator is very important as it will not only extend the life of the product but also ensure you are wearing a clean and disinfected respirator ever time.
RESPIRATORS SHOULD BE CLEANED AFTER EACH USE AS FOLLOWS USING DENTEC SAFETY RESPIRATOR WIPE ON COMFORT-AIR® 100, 300, 400 SERIES HALF MASK FACEPIECES
Make it part of your daily routine. In the amount of time it takes to wash your hands at the end of the day, you can also clean and disinfect our respirator using one of our respirator cleaning and disinfecting towelettes.
1. Take the respirator wipe and wipe the inside of the sealing area of the mask first.
2. Then wipe the interior of the mask.
3. Now wipe the exterior part of the shell to remove any excess dirt build up from the shell of the mask. 4. Inspect the facepiece, valves, and seats to be sure they are clean, smooth, and free of grit or other.
5. Replace the part or mask if there are any signs of wear and tear, punctures, tears in the exhalation valve.
6. Immediately replace the mask if there are any signs of chemical degradation on any part of the mask.
7. Store facepiece in plastic bag provided, without cartridges in an area away from contamination. Place facepiece front downwards, preferably in original carton. Make sure facepiece is not distorted by contact with other objects during storage. Do not hang facepiece by headbands.
IF THE RESPIRATOR IS TOO DIRTY TO USE A RESPIRATOR WIPE, PLEASE FOLLOW THESE INSTRUCTIONS
GENERAL MAINTENANCE
1. Disassemble respirator, removing cartridges, filters, and the headband assembly. Dust filter holders may either be removed or left in place. (Cartridges and filters should be discarded if there is any sign of contaminant accumulation).
2. Clean the respirator with soap and water, or a solution of commercial detergent. Use a soft brush or scrub with your fingers to remove all residue.
3. Rinse in clean warm water and air dry. (120°F / 49°C max.).
4. For general sterilization, immerse for 10 minutes in a 1% solution of Resorcinal, a 3% solution of Carbolic acid, a 2% solution of Lysol, or 70% solution of denatured alcohol (120°F / 49°C max.).
5. Rinse in clean warm water and air dry. (120°F / 49°C max.).
6. Inspect the facepiece, valves, and seats to be sure they are clean, smooth and free of grit or other.
7. Replace the part or mask if there are any signs of wear and tear, punctures, tears in the exhalation valve.
8. Immediately replace the mask if there are any signs of chemical degradation on any part of the mask. 9. Store facepiece in plastic bag provided, without cartridges in an area away from contamination. Place facepiece front downwards, preferably in original carton. Make sure facepiece is not distorted by contact with other objects during storage. Do not hang facepiece by headbands.
RESPIRATORS SHOULD BE CLEANED AFTER EACH USE AS FOLLOWS USING DENTEC SAFETY RESPIRATOR WIPE ON COMFORT-AIR® 130M FULL FACE MASK
Make it part of your daily routine. In the amount of time it takes to wash your hands at the end of the day, you can also clean and disinfect our respirator using one of our respirator cleaning and disinfecting towelettes.
1. Take the respirator wipe and wipe the inside of the sealing area of the mask first.
2. Then wipe the interior of the mask.
3. Now wipe the exterior part of the shell to remove any excess dirt build up from the shell of the mask. 4. Inspect the facepiece, valves, and seats to be sure they are clean, smooth and free of grit or other.
5. Replace the part or mask if there are any signs of wear and tear, punctures, tears in the exhalation valve.
6. Immediately replace the mask if there are any signs of chemical degradation on any part of the mask.
7. Store facepiece in plastic bag provided, without cartridges in an area away from contamination. Place facepiece front downwards, preferably in original carton. Make sure facepiece is not distorted by contact with other objects during storage. Do not hang facepiece by headbands.
IF THE RESPIRATOR IS TOO DIRTY TO USE A RESPIRATOR WIPE, PLEASE FOLLOW THESE INSTRUCTIONS
- Disassemble respirator, removing cartridges, filters and the headband assembly. Dust filter holders may either be removed or left in place. (Cartridges and filters should be discarded if there is any sign of contaminant accumulation).
2. Clean the respirator with soap and water, or a solution of commercial detergent. Use a soft brush or scrub with your fingers to remove all residue.
3. Rinse in clean warm water and air dry. (120°F max.).
4. For general sterilization, immerse for 10 minutes in a 1% solution of Resorcinal, a 3% solution of Carbolic acid, a 2% solution of Lysol, or 70% solution of denatured alcohol. (120°F max.).
5. Rinse in clean warm water and air dry. (120° F max.).
6. Inspect the facepiece, valves, and seats to be sure they are clean, smooth and free of grit or other foreign particles.
7. Store facepiece in plastic bag or nylon bag provided, without cartridges in an area away from contamination. Place facepiece front downwards, preferably in original carton. Make sure facepiece is not distorted by contact with other objects during storage. Do not hang facepiece by headbands.
8. Normal maintenance should not require removal of the lens. If it does become necessary to replace the lens:
a. Remove the 2 screws from the lens clamp.
b. Pull the ends of the lens clamp apart. A screwdriver pushed between the ends will help in separating them. Do not use a screwdriver between the clamps and the rubber channel of the face piece.
c. Pull retainers off facepiece.
d. Remove lens and discard.
e. Clean the inside of the lens channel with soap and water. Flush with clean water.
f. Note, that the replacement lens has marks on the main surface in the center of the longest edges. These marks are to be aligned with the small round dots molded onto the lens channel flange, top and bottom. Orient lens with the molded-in part number at the bottom of the lens channel.
g. Place one bead of the facepiece in the lowest portion of the channel, so that the mark on the lens aligns with the dot on the facepiece. Gradually ease the lens into the channel, working in both directions until the center of the upper portion of the channel fits over the lens. Make sure the ridge on the upper part of the facepiece is in line with the dot on the upper part of the lens.
h. Position the channel equally across the edge of the lens at all points.
i. Each lens clamp has a faint mark on outer surface in the center which must be aligned with the line on the lens. To assist in fitting the clamps, spray the inside with mold release (e.g. “Slide”, Percy Harness Corp.) DO NOT SPRAY THE FACEPIECE OR LENS. If a mold release is not available, wet the outer surfaces of the channel (particularly the back) and inside of clamps with water.
j. Position the lower clamp on the channel so that the mark on it is in line with the facepiece. Position all the clamp on the channel and push firmly from center, working toward the ends, to engage the clamp. It may be necessary to push downwards onto a table, or other surface, to fully engage clamp. Make sure the ends are fully engaged.
k. Repeat with other clamp. Make sure mark on channel lines up with mark on lens. It will be necessary to push ends of clamp toward lens to engage with the lower clamp. When properly mounted, the gap between the ends of the clamps should be less than ⅛ inch.
l. Replace screws and tighten until the ends of the clamps are drawn together along all of the flat surface.
9. The head harness may be removed by easing the barbed end stops through the rings on the buckles. Unsnap the headstrap from the lower buckles.
To reassemble:
1. Thread the barbed end of the middle head strap into the top center buckle ring, rib side of the strap facing toward the facepiece. Insert the barbed end through the buckle ring opening that is closest to the facepiece. Pull the barbed end completely through the buckle ring. Repeat for the other 4 straps. Reattach the head strap to the lower buckle rings.
2. The large plug with slots at the front of the respirator should NEVER be removed. This and the sealing disc it retains are held in place with adhesive. If the nut is removed for any reason the entire valve box assembly must be replaced.
REMOVAL OF PAINT ACCUMULATION
1. It is very important that paint is cleaned from facepiece at end of each shift, before it is stored, particularly from sealing edge which makes contact with face. Also, clean paint from valve seats and diaphragms. Failure to clean paint may reduce protection afforded by respirator.
2. Disassemble respirator as described above, immerse facepiece and parts (excluding cartridges and pre-filters) into any chemical alkaline detergent stripping agent. Use manufacturers instructions for dilution and use. A prior test may be performed on a small area of chin cup near inside edge to check that the solution will not damage facepiece material.
3. Soak until accumulated paint loosens
4. Rinse thoroughly in clean water and air dry.
5. Inspect parts for damage and replace where necessary. Valve diaphragms and seats should be clean, smooth and free of grit or other foreign particles.
6. Reassemble and store as above.
7. Inspect pre-filters and change when increased breathing resistance is noticed or they become damaged
8. or clogged with paint. Always use correct replacement filters. Do not use filters from other manufacturer, or materials made for some other purpose.
9. Change cartridges as soon as odor of paint is detected while wearing respirator, or if they become damaged.
CAUTION: Do not use solvent type cleaners, they may damage the rubber or plastic parts. Do not use respirator without inhalation or exhalation valve diaphragms, or exhalation valve cover. Inspect all components regularly and replace with correct parts when necessary


